Impulz Technologies LLC

Menu
  • Home
  • About Us
  • Solutions
    • Microsoft Dynamics 365 Finance & Supply Chain Management
    • Microsoft Power Platform
      • Power BI
      • Power Apps
  • Products
    • Impulz Positive Pay
    • Impulz Construction 365
  • Blog
  • Services
    • Application Support And Maintenance
    • ISV Development
    • Project Resources
  • Clients
  • Contact Us

Impulz Technologies LLC

Implement XDS in Microsoft Dynamics 365 Finance and Operations

  • Home
  • Blog
  • Dynamics 365
  • Implement XDS in Microsoft Dynamics 365 Finance and Operations
  • August 17, 2022August 22, 2022
  • Shahbaz Khan

In this example wewill get to know how to implement XDS policy in Dynamics 365 Finance and Operations.

XDS Policy
XDS policy is basically a data security in Dynamics 365 which enables to show only specific data from a specific set of users that has particular role assigned to them.

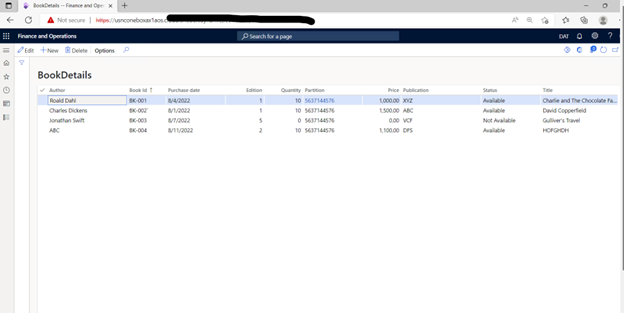
Lets get into the steps to enable XDS on a table LMS_BookDetails in which data related to only those books which has status set to Available will be visible to the user.

  1. Create a query consist of the table LMS_BookDetails on which we want to apply xds.

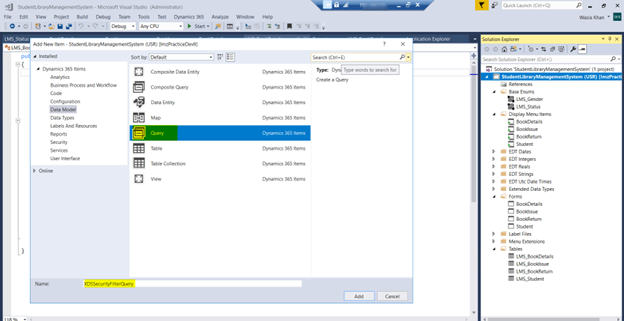
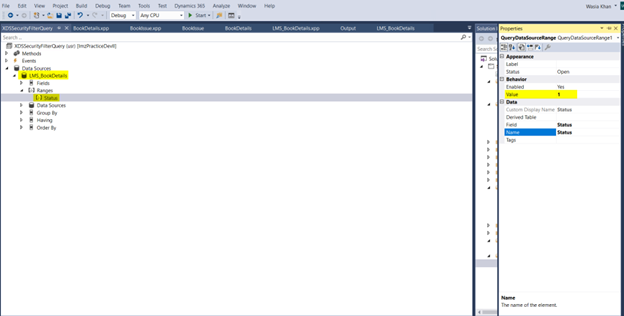
  1. Add required data source i.e. LMS_BookDetails in the query and then apply ranges on it.

  1. This is an optional step. If you want to confirm that query is filtering data according to requirement, just create a demo view and add that query in the view. Build your project and sync database. Open the view in table browser to verify if its showing filtered data then it means it will work on xds as well. If the view does not show the desired records, go back and fix your query.
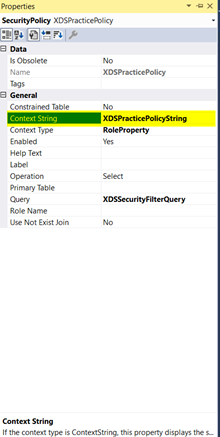
  2. After creating the query create a security policy. Go to properties and set the query created in step 1. Set the context type to role property.

The ContextString is intended to be used in x++ code to enable/disable policies.

The RoleProperty is defined as context string on the roles. You can then link multiple roles to one or more  policies with a certain context string.

The RoleName is used to have a policy enabled for just one particular form.

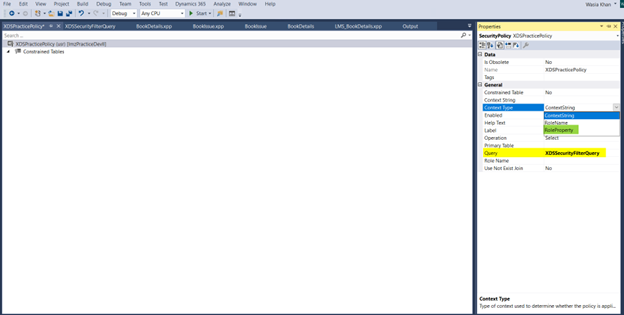
  1. Then set the context string to whatever string you want. In our case it is “XDSPracticePolicyString”. This context string will be used for applying xds policy to any role you want.

  1. Set the following properties as shown in the below image.

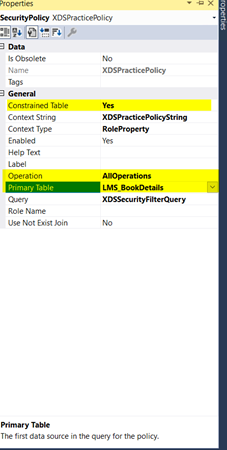
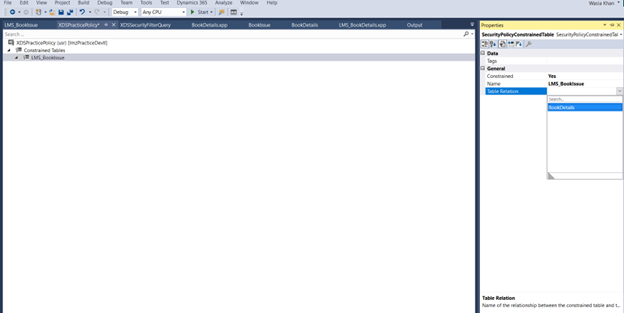
  1. Now for constraint table node in the xds policy. Constraint table is basically table record related to the primary table which will have the xds policy applied on it. It means in our case LMS_BookIssue table will also contains data for only available books status. The properties are set below in the image.

Note: You can skip constraint table if you just want to apply xds on the master table rather than other table which has master table’s primary key as foreign key.

  1. After that build your project and sync database.
  2. Then go to dynamics security configuration and select a role. Enter the xds context string in the context string text box , this will make sure that the policy is applied against this role. You can use a single context string for multiple xds security policies.

Note: XDS security will not work if the user has admin role assigned to it.

Posted in Dynamics 365Tagged D365, Dynamics 365 FO Security, Microsoft Dynamics 365, Microsoft Dynamics 365 Finance and Operations, XDS Framework

Recent Posts

  • Microsoft Dynamics 365 Finance and Operations: Importing deployable package to UAT/Production using Lifecycle Services
  • Postman Best Practices for Microsoft Dynamics 365 Finance and Supply Chain Management
  • Microsoft Dataverse is not a database
  • Connect the Angular with Microsoft Dataverse – Part 3 of 3
  • Connect the Angular with a Microsoft Dataverse using Web API – Part 2 of 3

Recent Comments

No comments to show.

Archives

  • April 2023
  • February 2023
  • January 2023
  • October 2022
  • September 2022
  • August 2022
  • July 2022

Categories

  • Business
  • Dynamics 365
  • Microsoft Azure
  • Microsoft Dataverse
  • Microsoft Power Platform
  • Power BI
  • Uncategorized

Latest Post

  • Microsoft Dynamics 365 Finance and Operations: Importing deployable package to UAT/Production using Lifecycle Services
  • Postman Best Practices for Microsoft Dynamics 365 Finance and Supply Chain Management
  • Microsoft Dataverse is not a database
  • Connect the Angular with Microsoft Dataverse – Part 3 of 3
  • Connect the Angular with a Microsoft Dataverse using Web API – Part 2 of 3

Tags

Application integration with D365 Azure Azure AD Banking D365 D365 code management D365 FO D365 FO Azure DevOps D365 FO Customization D365 FO Extensions D365 FO VM Deployment D365 MPOS Retail D365FO Excel Export to SharePoint Dataverse Dataverse integration Debugging Development dev to UAT Dynamics 365 Finance and Operations Dynamics 365 FO Security Dynamics 365 with git Lifecycle Services Microsoft .Net Microsoft Azure Microsoft Dataverse Microsoft Dynamics 365 Microsoft Dynamics 365 Commerce Microsoft Dynamics 365 Finance and Operations Microsoft Dynamics 365 Retail MPOS Microsoft Dynamics 365 Retail MPOS customization Microsoft Dynamics 365 version control Model Driven Apps OAuth 2.0 Package deployment Positive pay Postman Power Apps Power BI Power Platform Reporting Safe pay SharePoint Virtual Machine Web APIs X++
© Impulz Technologies - All right reserved.